
Maybe this can help you!
- Tutorial: How To Install a Blogger Template?
- Video: Speedify - Premium Blogger Template (Full Installation)
- Tutorial: How To Setup Templateify Post Shortcodes
Setup Speedify
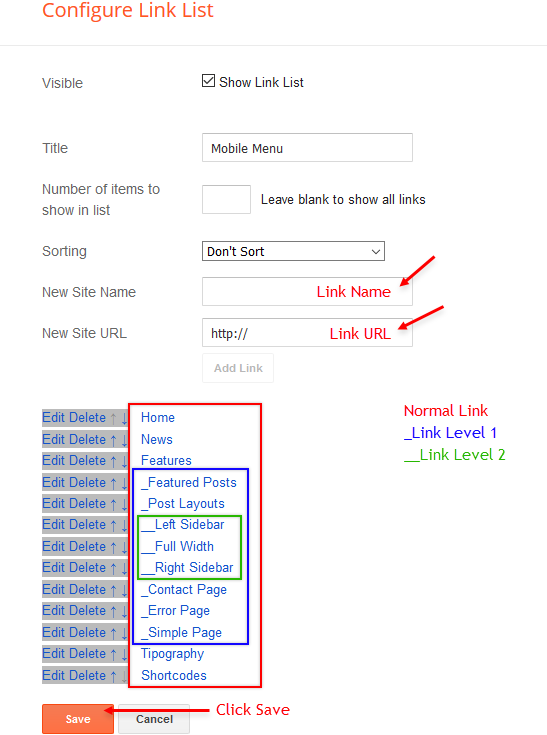
Check out below, all steps to setup this theme.Mobile Menu
Access your blog Layout > and click on the Edit Icon > in the Mobile Menu gadget.Layout Example:

Mobile Menu DropDown Options:
Normal Link Ex:Sub Link Level 1 Ex:
Sub Link Level 2 Ex:
Widget Settings:
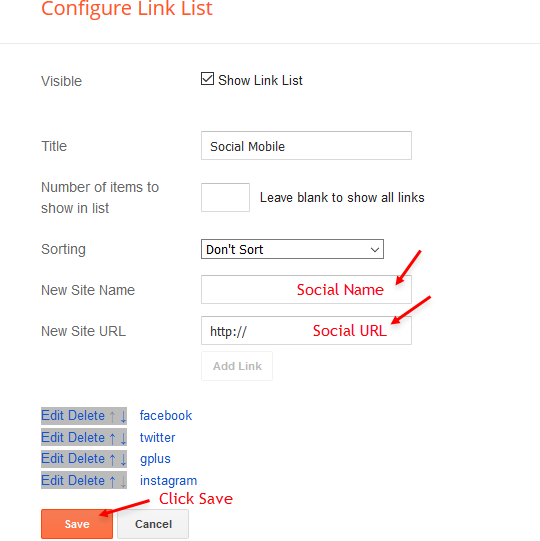
Social Mobile
Access your blog Layout > and click on the Edit Icon > in the Social Mobile gadget.Supported Icons:
Widget Settings:
Main Logo
Access your blog Layout > and click on the Edit Icon > in the Main Logo gadget.Widget Settings:
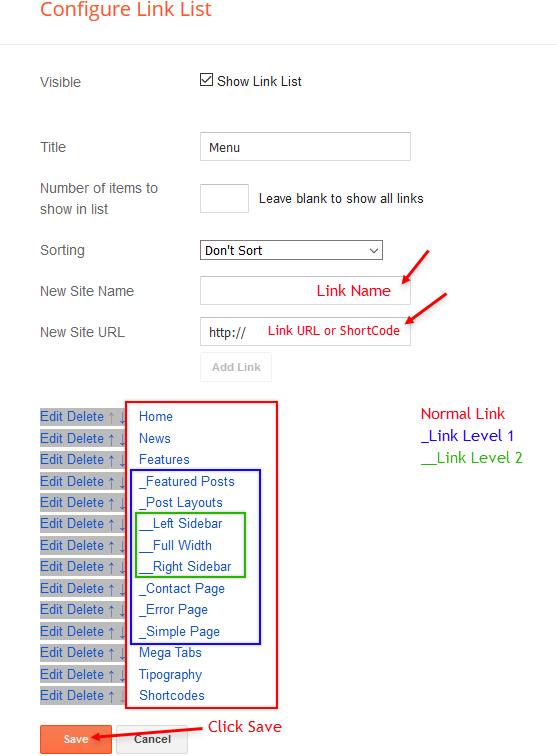
Main Menu
Access your blog Layout > and click on the Edit Icon > in the Main Menu gadget.DropDown Options:
Normal Link Ex:Sub Link Level 1 Ex:
Sub Link Level 2 Ex:
MegaMenu Options:
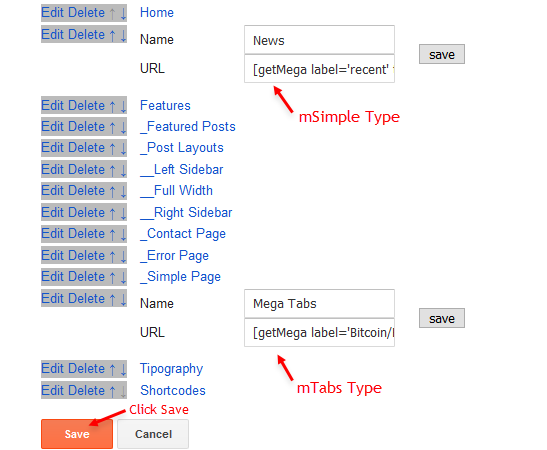
Shortcode Structure:Shortcode Types:
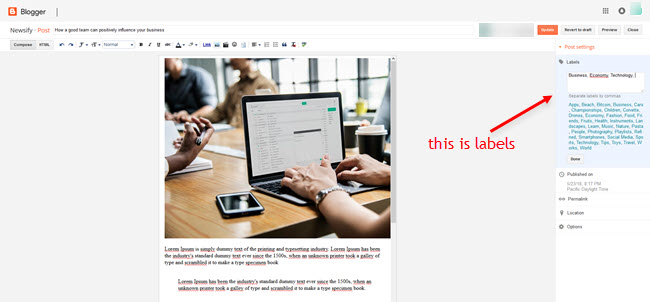
Shortcode Label:
What are Label?
Shortcode mSimple Ex:
Shortcode mTabs Ex:
Widget Settings 01:
Widget Settings 02:
Main Featured
Access your blog Layout > and click on the Add a Gadget > Featured Post in the Main Featured or Sidebar sections.Select the post you want to display and click save.
Main HomePage ADS
Access your blog Layout > and click on the Add a Gadget > HTML/JavaScript, Image or AdSense > in the section Main HomePage Ads.
Main Posts
Access your blog Layout > and click on the Edit Icon > in the Main Posts/Blog Posts gadget.Widget Settings:

ADS Inside Posts
Access your blog Layout > and click on the Add a Gadget > HTML/JavaScript, Image or AdSense > in the sections Ads Top or Ads Footer.HTML/JavaScript Ex:
Author Box
The widget receives the google plus information or blogger profile automatically, As long as your profile is marked as public. The icons are displayed if there are links in the description.Supported Icons:
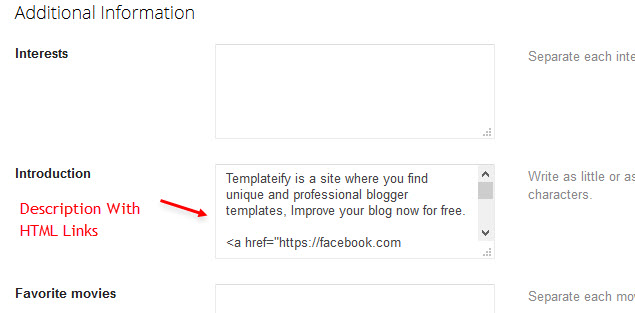
Blogger Settings: Go to https://www.blogger.com/edit-profile.g
Find for Additional Information > Introduction > and add your description with HTML links.HTML Link EX:
Google Plus Settings: Go to https://aboutme.google.com/?referer=gplus
Find for Story > click on Edit icon > and add your description with social links.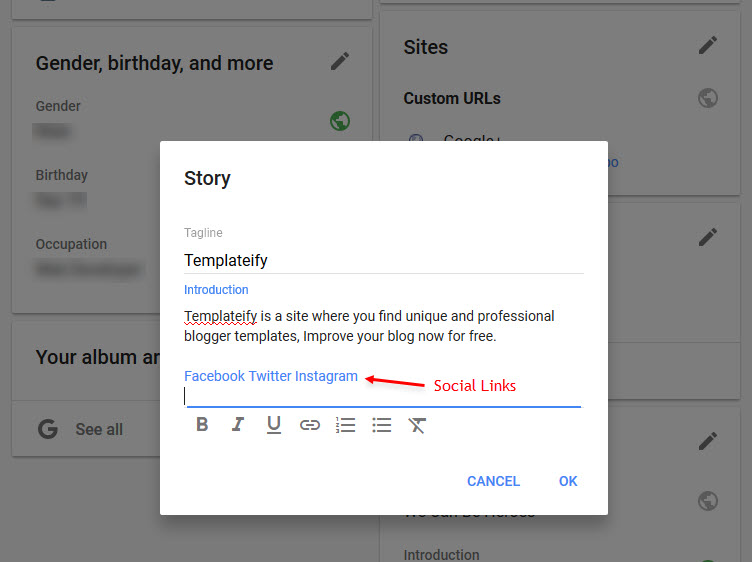
Post Layouts and Contact Form
Full Width:Left Sidebar:
Right Sidebar:
Contact Form:
Example:
Post List Widgets
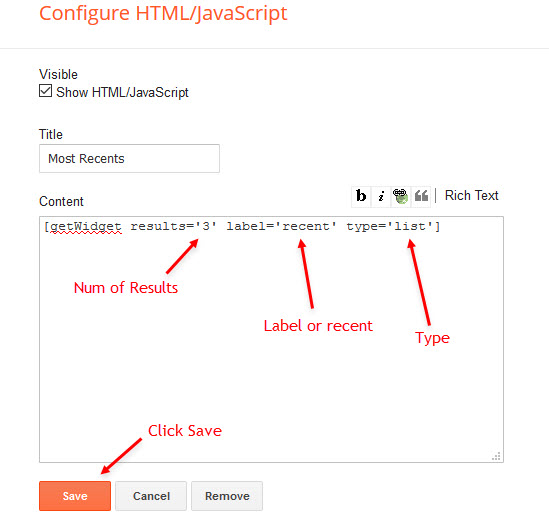
Access your blog Layout > and click on the Add a Gadget > HTML/JavaScript > in the Sidebar or Footer sections.Shortcode Structure:
Shortcode Label:
Shortcode Results: You must add the desired number of results.
Shortcode Example:
Widget Settings:
Social Icons on Sidebar
Access your blog Layout > and click on the Edit Icon > in the sidebar Social Icons.Supported Icons:
Widget Settings:
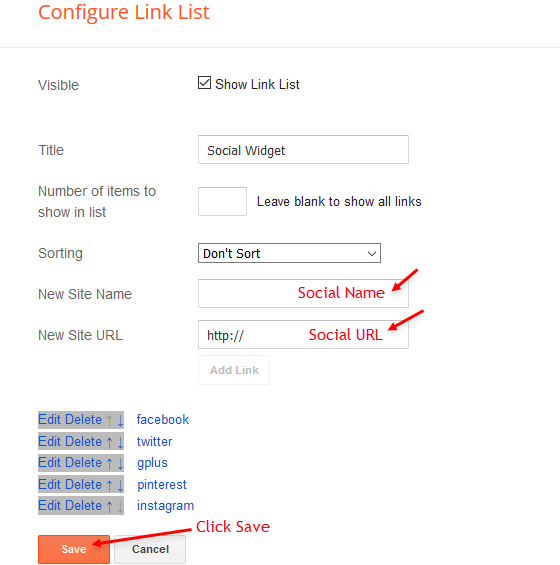
Facebook Page Plugin Code
Access your blog Layout > and click on the Add a Gadget > HTML/JavaScript > in the Sidebar or Footer sections.NOTE: To add the Page Plugin, you will need to install the facebook SDK on your blog, how to install it by clicking here.
Add This Code:
<div class="fb-page" data-href="YOUR FACEBOOK PAGE URL" data-width="360" data-small-header="false" data-adapt-container-width="true" data-hide-cover="false" data-show-facepile="true"></div>Instagram Widget
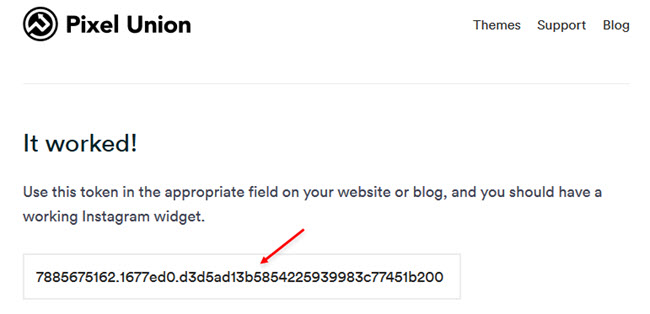
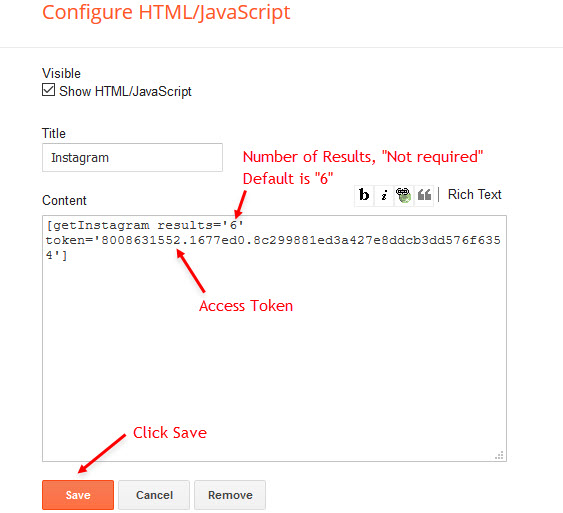
Shortcode Structure:
To add the instagram widget you need to get an access token, which you can generate on this site http://instagram.pixelunion.net/
Step 01:

Step 02:

Step 03:

Step 04:
Widget Setting:
Sidebar Widget Style
Access your blog Layout > and click on the Edit Icon > in the Sidebar gadgets.Title ShortCode:
Widget Settings:
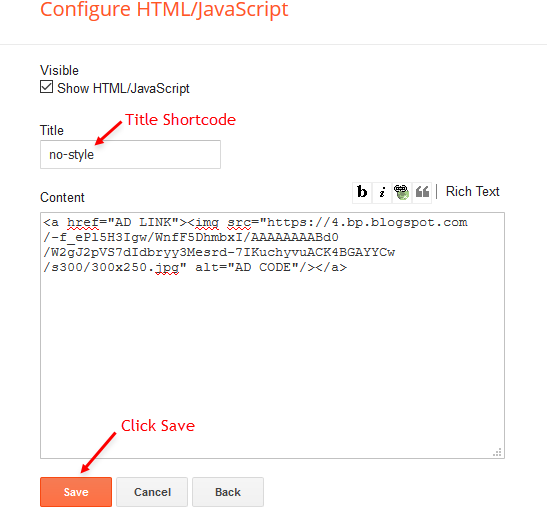
Widget Final Result:

Social on Footer
Access your blog Layout > and click on the Edit Icon > in the Social on Footer gadget.Supported Icons:
Widget Settings:
Theme Options
1.1 - Facebook SDK
The Page Plugin as well as facebook comments only work if you have the Facebook SDK installed on your theme. See below for the steps to acquire and install the Facebook SDK.Get SDK:
Step 01: Go to https://developers.facebook.com/docs/plugins/page-plugin/ and click on Get Code button and copy the SDK Script.Copying SDK:
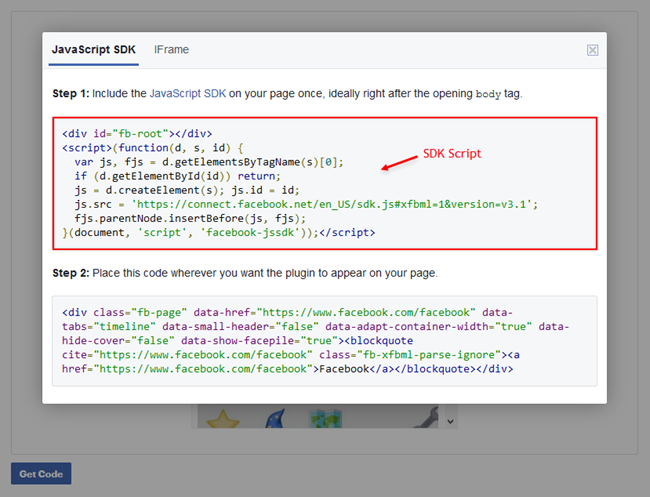
SDK en_US:
<script>(function(d, s, id) {
var js, fjs = d.getElementsByTagName(s)[0];
if (d.getElementById(id)) return;
js = d.createElement(s); js.id = id;
js.src = 'https://connect.facebook.net/en_US/sdk.js#xfbml=1&version=v3.1';
fjs.parentNode.insertBefore(js, fjs);
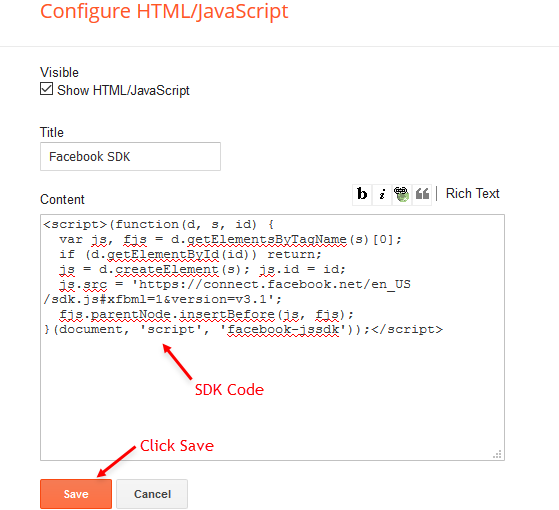
}(document, 'script', 'facebook-jssdk'));</script>Installing SDK:
Access your blog Layout > and click on the Edit Icon > in the Advanced Options > Facebook SDK gadget.Widget Settings:
1.2 - Boxed Version
Access your blog Layout > and click on the Edit Icon > in the Advanced Options > Boxed Version gadget.Option boxedVersion:
Widget Settings:

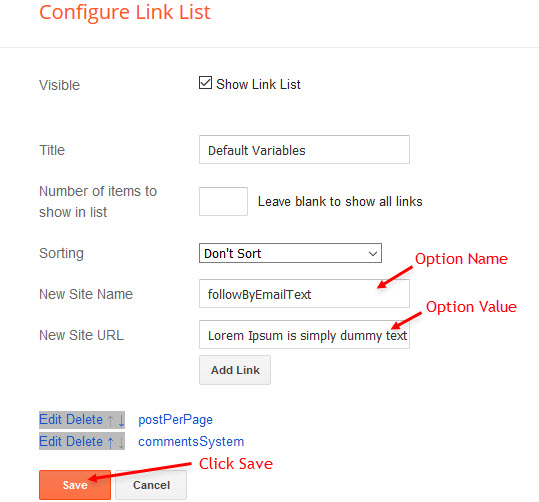
1.3 - Default Variables
Access your blog Layout > and click on the Edit Icon > in the Advanced Options > Default Variables gadget.Options:
monthFormat: default is
fixedMenu:
fixedSidebar:
postPerPage: Set the number of results to search for labels, should be the same as of posts on the home page, default is
followByEmailText: default is
commentsSystem:
disqusShortname: If you add the disqus form, you will then have to add the username of your form, default is
NOTE: To add the Facebook Comments, you will need to install the facebook SDK on your blog, how to install it by clicking here.
Widget Settings:
How to Customize This Theme?
Access your blog Theme > and click on the Customize button > and find Background and Advanced options.Available for customization: Background, Widths, Colors and much more.
Example Background:

Example Advanced:
